Friday 31 July 2015

For Someone Special - Card Tutorial - by Jacqueline Moore

Hello!! 

I hope you have all had a good week? I can't believe that it is the end of July already!!! How quickly has the year gone by?

It's my turn again on the 13 Arts blog, and I'm just stopping by today to share with you another card and step-by-step tutorial.


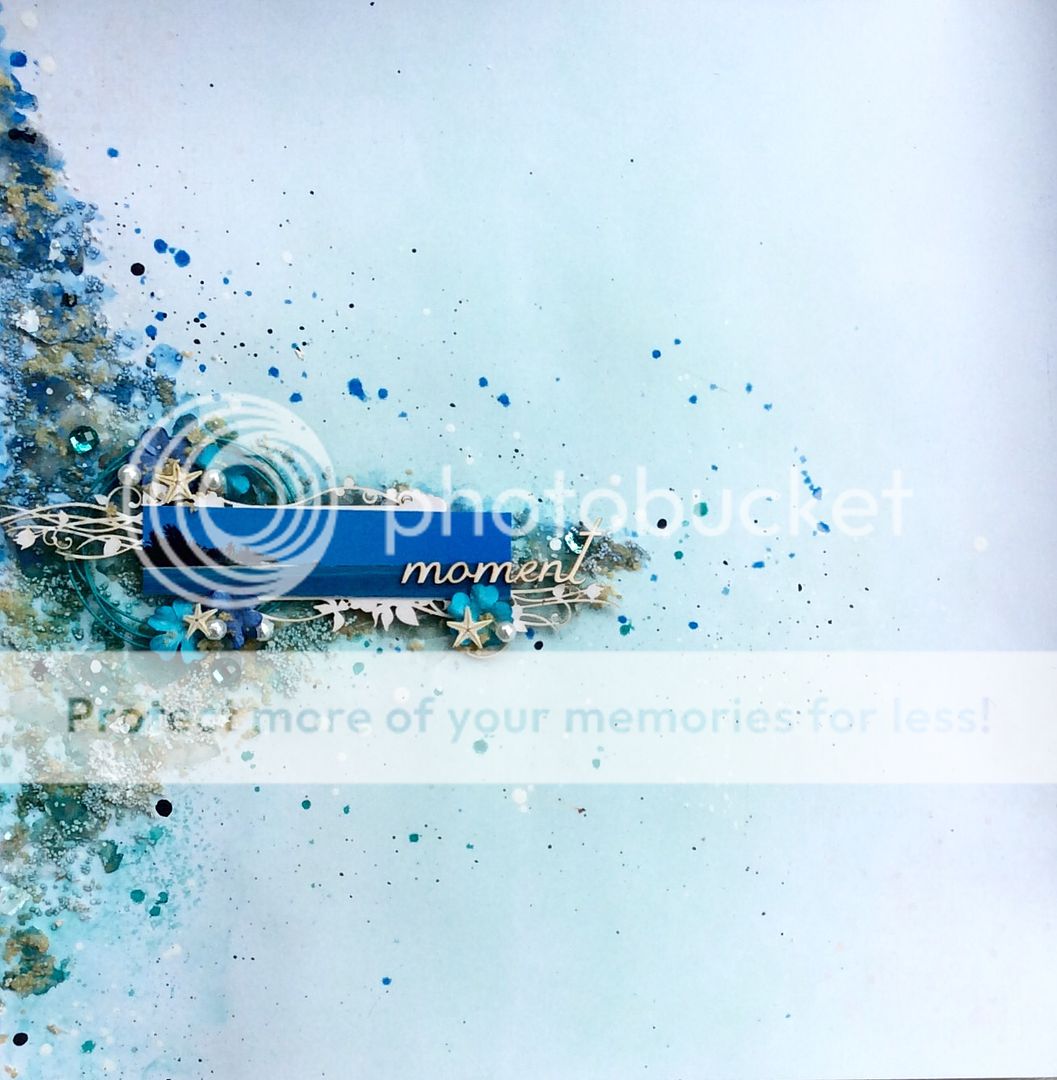
'For Someone Special'
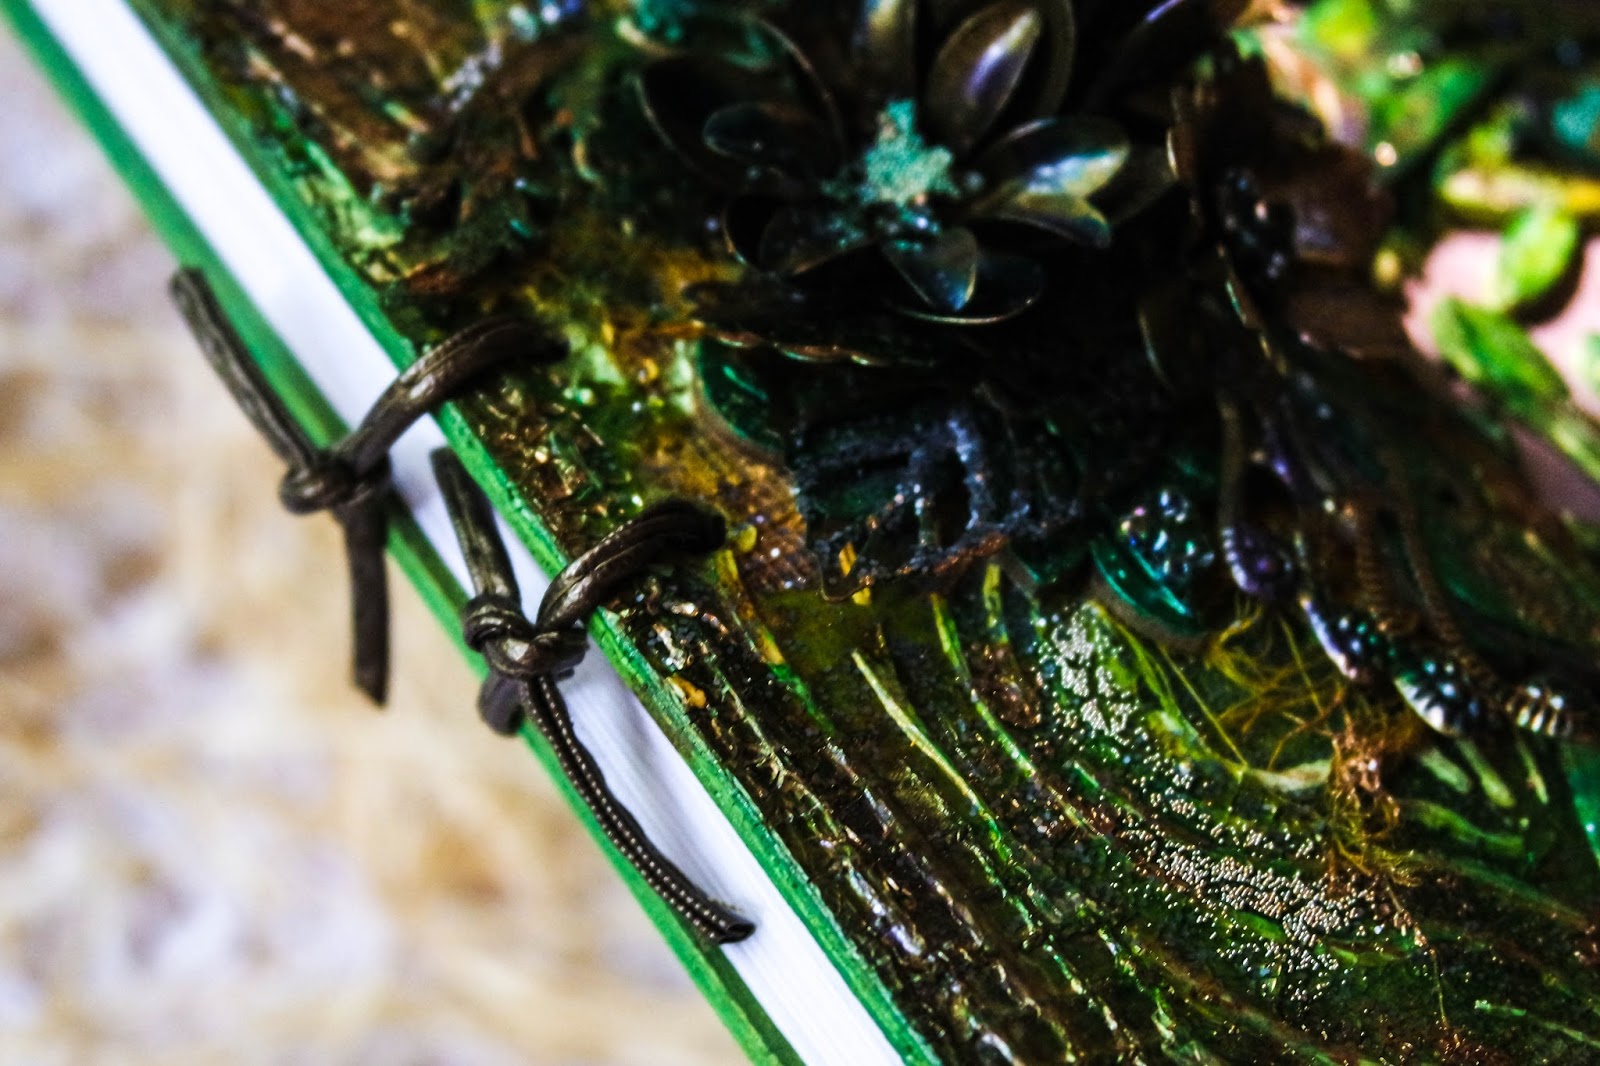

Some close-ups:


Lot's of dimension!!


And here is the tutorial:

Step 1 and 2: Cut a piece of paper from the mental vacation Collection to fit the front of your card. Distress the edges and attach with double-sided tape, then use a palette knife to spread gesso over the front of your card. 


Steps 3 and 4: Mix some Modelling Paste with Magic! Powder to create a nice thick paste that will crack when applied, then use your palette knife to spread the paste through your stencil/stencils. When the paste is dry add some random stamping with archival ink.


Steps 4 and 5: Now it is time to add color. I have mixed Pearl Turquoise light with a tiny bit of Vivid Violet paint to get this gorgeous Deep Blue. I have painted it onto my background in a roucgh diamond shape adding some of the Pearl Turquoise light on its own as well. Give everything a few sprays of water and let the colors run.


Steps 6 and 7: Add some Washi Tape and Cut your papers. Distress the edges and attach with foam tape and glue for added strength.


Steps 8 and 9: Tear a piece of Calico and add it to your layers then glue some Hemp Twine in a circle on top. Next I have covered a chipboard frame with Washi Tape and placed it on top before adding a flower and another circle of Jute Twine in Apricot. I have then added a few splashes of Pastel Salmon Mist to the background.


Steps 10 and 11: Add some more flowers brushed with Gesso, a resin clock, and metal leaf painted White. I have also decided to lighten up the edges of the card a little by rubbing some Gesso into it with my finger. I added some more paint flicks of the deep blue I mixed up for my background. Add some Light Grey Grit randomly to your card using Gel medium to hold it in place.


Step 12: Finish off by writing your sentiment on white card with a black pen, cutting it out and attaching firmly to your card. Then use your black pen to draw an outline on the Washi Tape chipboard frame and to draw a zigzag stitch around the edge of the card. 


I hope you like my card and that you enjoyed my tutorial!!!

13 Arts products used:
Mental Vacation Papers 
Starlight Papers
Gesso
Gel Medium 
Modelling Paste
MAGIC! Powder
Ayeeda Mist - Pearl Turquoise Light
Ayeeda Mist - Pastel Salmon
Ayeeda Paint - Vivid Violet
Mental Vacation Stencil - Grid
Fly Away Stencil
Colored Grit - Light Grey 


Thursday 30 July 2015

Winners for Challenge #32 / Wyniki wyzwania #32

Hey all and thank you for joining our challenge #32 - vacation
We had 32 each more amazing project in our challenge and our team has voted now.
The results are...drum roll...

Witajcie! Dziękujemy Wam, że zechcieliście dołączyć do naszego wyzwania #32 "Wakacje"
Zgłoszono 32 wakacyjne, niesamowite projekty i nasz zespół w ramach głosowania zadecydował, że wyniki wyglądają następująco...*fanfary*


Congrats Agata! Your layout made us relax just as vacation should. It's pure and fresh, still filled with details and beautiful elements. Great work!
Take your badge above and wear it with a big proud.
You will receive a gift voucher for shopping in 13@rts store worth 60 PLN with free international postage. We would also like to invite you for guest designing in one of our next challenges. Please send us an e-mail at: 13arts@wp.pl in seven days after the challenge results to claim your prize.

Gratulacje Agato! Twój layout działa na nas tak relaksująco jak wakacje. Jest czysty i świeży, wypełniony detalami i pięknymi elementami! Wspaniała praca!
Otrzymujesz od nas voucher na zakupy w sklepie 13arts o wartości 60zł z bezpłatną, międzynarodową przesyłką. Zapraszamy Cię również do gościnnego projektowania w jednym z naszych kolejnych wyzwań. Proszę, wyślij nam wiadomość na adres 13arts@wp.pl w ciągu siedmiu dni od ogłoszenia wyników w celu odebrania swojej nagrody. Przyjmij też od nas banerek i noś z dumą. 

We also want to mention two other projects.
Chcielibyśmy również wyróżnić dwa inne projekty:

Congratulation Louise Nelson and Sandra Bernard!
Gratulacje dla Loise Nelson i Sandry Bernard!


Louise Nelson and Sandra Bernard, please take your badge here above!
Loise Nelson i Sandro Bernard, proszę przyjmijcie od nas powyższy banerek! 

Thank you all again for joining us and be sure to come back soon for our next challenge. It will be something very inspiring and pretty!

Best regards,
13@rts DT

Dziękujemy Wam za udział i koniecznie wpadnijcie do nas wkrótce na kolejne wyzwanie! 
Będzie coś ładnego i bardzo inspirującego :) 
Pozdrawiamy!
Zespół 13@rts

Wednesday 29 July 2015

Be awesome - layout by Anna Rogalska

Hello everybody! It's Anna Rogalska today! I'd like to share with you my next layout for 13arts.
For my project, I choose a 'Polaris' paper  from the 'Starlight' collection.


Witam wszystkich! Tutaj Anna Rogalska. Chciałabym Wam pokazać mój kolejny layout dla 13arts. 
Do mojego projektu wybrałam papier 'Polaris' z kolekcji 'Starlight'
 

Some close-ups

Kilka zbliżeń


To create my background I have chosen the few mists, gesso, silver hologram glitter, natural mika flakes and grained grit with gel medium.
Do zrobienia mojego tła wybrałam kilka mgiełek, gesso, srebrny brokat hologramowy, naturalną mikę w płatkach, barwiony żwirek z żelem mediowym.


I decorated my layout with some hand-made flowers from 13arts papers.

Mój layout udekorowałam własnoręcznie zrobionymi kwiatami z papierów 13arts.


Silver hologram glitter
Natural mika flakes - silver
Colored Fine - Grained Grit
Medium żelowe- Gel medium MAT
Gesso - grunt akrylowy 120ml  
Szpachelka malarska nr 8 
Tusz akrylowy SPLASH! White    
Tusz akrylowy SPLASH! Black  
Acrylic Modeling Paste
Acrylic Liquid Medium
Paper Starlight - Polaris
Paper Starlight - Virgo
Ayeeda Mist Pastel Kobalt
Ayeeda Mist Pastel Blue
Ayeeda Mist Pastel Mint
Mgiełka perłowa - Brown Light 
Mask - Stencil - Stars 
Tekturka Chipboard "Starlight-words"    


Thanks for visiting! Have a nice day!     
 
  Dziękuję za odwiedziny! Miłego dnia! 

Anna Rogalska
 

Tuesday 28 July 2015

Notebook by Natalya Loi

 Hello!!!
Natalya Loi is here.  Today, I'd like to show you my new mixed media notebook with wooden coverFor creating it I used my favorite 13arts' materials  - modeling paste,  masks, sprays and stunning ayeeda metallic paints!


Some details:


Lace and ribbon coated with gesso and then colored with sprays and paints


A wooden cover has beautiful holes through which rayed a sheet of paper Cozy Evening


The cover and sheets tied a leather cord


Metallic paints have incredible shine!


13@rts products used:
Ayeeda Gesso White
Ayeeda Medium Modeling Paste
Magic Powder
Acrylic gel medium
Ayeeda paint -Metallic Green
Ayeeda paint -Metallic Blue
Ayeeda paint -Metallic Violet
Ayeeda Paint METALLIC! Dark Yellow
Ayeeda Paint - Pearl Gold
Pearl Mist – Olive Green
Chalk Mist - Chalk Yellow Amber
Microspheres silver
Glass microspheres D5
Paper Cozy Evening

♥♥♥

Thank you for stopping by today!


Monday 27 July 2015

altered clock - by Ingrid


Don't you just love when a project turns out exactly how you visualized it in your head?!!
This altered clock is one of those projects.
I knew the colors and the feel of how it had to look and I just love how it turned out!

Started this clock by glueing some kitchen paper towel with 13arts acrylic gel medium.
Added all the embellishments, buttons, pearls and gears, and give it two coats with 13arts gesso.
Painted with my favorite color, turquoise and a touch of pink.
After all the paints I added the flowers:
 some paper flowers,mini roses, handmade thread flowers and the gorgeous tulle flower form 13arts.
The paper flowers were given a touch with gesso as well because I wanted a more softer look.
Also added a metal butterfly and some twigs.

Left side of the clock.
As you can see I let the design run through the left side as well.

Did the same on the right side.

The gorgeous tulle flower from 13arts.

The metal butterfly is from a Dutch home decor store.

The painted chipboard gears, buttons, pearls and metal mini flowers.
After all the paints I gave them all a touch with gesso for a more softer look.

Top and left side.

Those big paper flowers were in my stash forever and after a good coat with gesso 
they matched this project perfectly! 


13arts products used:
Acrylic gel medium
Pearl pink
Pastel turquoise
Chalk turquoise
Chalk turquoise light
Gesso
Pearls
Tulle flower
Twigs
Mini roses

Enjoy your day!
Ingrid xxx

Sunday 26 July 2015

Two amazing projects from our Guest Designers- Fiona Paltridge and Katsiaryna Manchuk!

Hello! Today we have two more new projects from our wonderful Guest Designers for you! Optymistic layout full of colors from Fiona Paltridge and emotional page from Katsiaryna Manchuk!

Witajcie! Dzisiaj mamy dla Was dwa projekty od naszych fantastycznych Gościnnych Projektantek! Optymistyczny layout od  Fiony Paltridge i nostalgiczną stronę od Katsiaryny Manchuk!


***

Fiona Paltridge


Hello scrapping friends. I am here to share with you my next creation as a Guest Designer for 13@rts for the month of July. I was keen create using one of my favourite collections the “Timeless” collection.

I wanted to achieve a very pretty girly theme for this layout so I choose two coordinating colours from the Aydeea Mist Chalk Sprays, Turquoise and Fuchsia spraying them mon the background and allowing them to drip down the page. I then added some cute little stars through the “little Stars” stencil using some of the Ayeeda Medium Modeling Paste.
I added some Gardenia flowers that I also coloured using the chalk sprays and some little white rose buds as well as some medium white roses. The chalk sprays are very good at covering anything. I even coloured some cheese cloth material to add under the flowers. I also added the Light Turquoise to the frame and toned down the Fuchsia with the Ayeeda Medium White Gesso to make a beautiful soft pink colour.
I used lots of flicks of Turquoise and Fuchsia to fill in the background with colour as well as spraying the chalks and allowing them to drip.
You can see this project coming together in the process video I have made.
I absolutely love this colour combination. I’ll have to try it again on another project. I hope you have enjoyed my project. Thank you for popping in. See you again next month.

Product List:

***


Witam! To Kasechka. Do pracy wybrałam nietypowe dla siebie zdjęcie i zrobiłam emocjonalną stronę wykorzystując do tego przede wszystkim produkty od 13arts.

Hello! Kasechka here! To make my project I chose an untypical picture and I made emotional page using 13arts products. 


To zupełnie nowe dla mnie materiały i miałam wielką frajdę pracując z nimi, odkrywając coraz więcej możliwosci!
These are new materials for me, and I had a lot of fun working with them and discovering more and more opportunities


Trochę szczegółów:
Some more details:


Material list:
paper: Sagitarius 
white cardstock, 
black Gesso, 
modeling paste, 
glass microbeads d2, 
holographic glitter,
Mists: Old Gold, Burnt Sienna, Pastel Salmon, Woodbine, Pearl Orange
Stencil- text


***
Thank you for your beautiful projects Ladies!
Dziękujemy za Wasze piękne projekty dziewczyny!